One of my biggest challenges while renting is making the space feel like me—without losing the extremely expensive deposit. And while most leases frown upon hammering nails into the wall, that doesn’t mean your walls have to be boring.
If you’re craving that “effortlessly styled” aesthetic you see in magazine spreads or Pinterest boards, let me introduce you to the renter’s secret weapon: the gallery ledge wall. It’s minimalist, functional, and incredibly chic—plus, it’s easy to change up when your style (or the season) shifts.
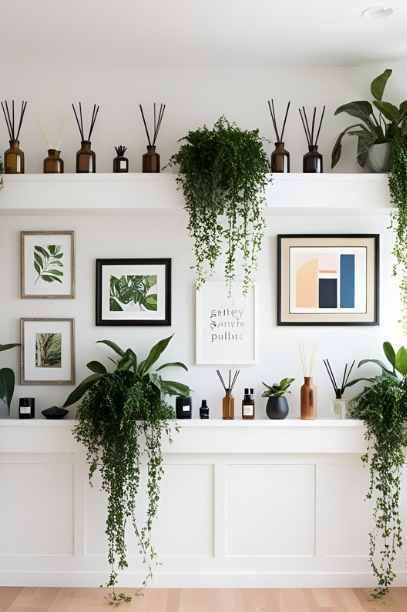
In this project, I walk through how to build that layered look with self-adhesive ledges (I know I didn’t know those existed either), art prints, and cozy home accents. Whether you’re sprucing up your entryway, styling above your bed, or adding life to a forgotten corner, this renter-friendly upgrade is all about comfort and character.
First: Supplies You’ll Need
All items are renter-safe and linked so you can recreate the look easily from your apartment or dorm!
| Item | Description | Link |
| Wall Ledges | Lightweight, light drill ledges that stick to your wall securely | Shop My Favorite Set on Amazon |
| Framed Prints or Personal Photos | A mix of sizes looks best | Botanical Neutral Print Set |
| Decorative Vases or Objects | Think ceramic, woven, or textured finishes | Minimalist Vase Trio – Amazon |
| Books or Mini Frames | Use to layer heights and soften the look | Under $10 Decorative Books |
| Battery-Powered Picture Lights | Optional, but they add a warm glow | Magnetic LED Clip-On Lights |
Step 1: Plan Your Space
Decide where your gallery ledge wall will go. Good spots:
- Over a console table or dresser
- Behind your bed as a faux headboard
- Along a hallway or entry nook
- Above a desk for a workspace upgrade
Timeless pro tip: Measure the width of the space and sketch out a layout or arrange items on the floor first to visualize the balance of frames and objects.
Step 2: Install the Ledges
Wipe down your wall to remove dust or residue.
Peel the backing off your adhesive ledges and press them firmly into place, holding for 30–60 seconds to ensure strong grip.
Double-check that they’re level—and always follow the weight limit guidelines.
These ledges hold up to 5 lbs each and look like real wood. Perfect for frames and lightweight accents.
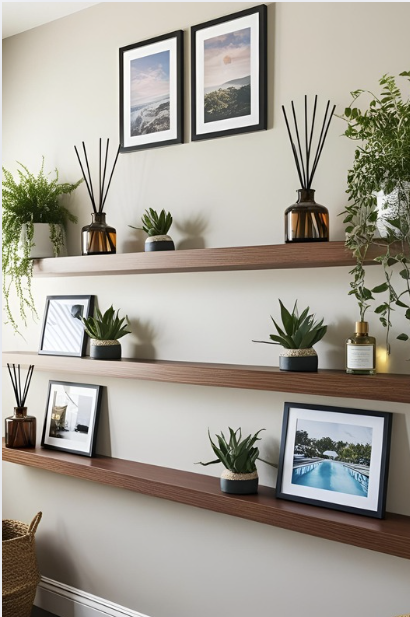
Step 3: Layer Your Frames
Start with your largest print or piece in the back as your anchor. Then lean smaller frames or artwork in front for a relaxed, curated look.
Don’t be afraid to overlap them a little—that’s what gives it charm.
Mix vertical and horizontal pieces for visual interest, and keep your color palette soft or cohesive for that timeless feel.
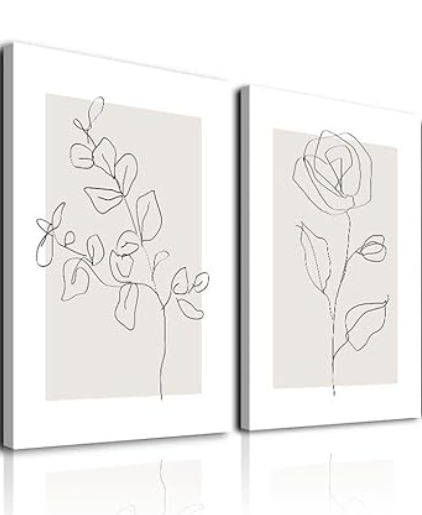
Need prints? Try these neutral botanical set. These work with any style and look beautiful year-round.
Step 4: Add Texture & Dimension
Now for the fun part—styling your ledges with small decorative pieces. Add:
- A mini vase with eucalyptus stems
- A small trailing plant or faux greenery
- A stack of vintage-style books
- A scented candle or sculptural object
This brings warmth and depth to the wall, making it feel less like a gallery and more like a story.
These ceramic vases are a favorite – affordable and aesthetic.
Want a freebie? Click this link to get a free diffuser and 30% off oils
Step 5: Finish with Cozy Lighting (Optional)
Battery-powered picture lights or fairy lights above your frames can completely transform the vibe at night.
If you want a museum-style finish, magnetic clip-on picture lights are a dream—they’re adhesive, wireless, and adjustable.
These rechargeable lights are perfect for renters—no wiring needed.
Style Variations to Try
- Theme it: Botanical, travel, black and white photography, or seasonal prints
- Use one long ledge instead of stacked ones for a cleaner look
- Switch in holiday decor like mini wreaths or seasonal art to refresh without redecorating
Why You’ll Love It
✔️ Easy to update when your style evolves
✔️ Adds warmth, texture, and a lived-in feel
✔️ Great way to display your personality without clutter
Whether you’re cozying up a studio apartment or making a blank hallway feel like home, this gallery ledge wall project gives you freedom to style with light damage—and makes even the most basic rental feel uniquely yours.
Tag me @mytimelesscomfort if you give this project a try—I’d love to see how you style your space. And don’t forget to pin this for your next weekend refresh
Happy Decorating!
Leave a Reply